

OUR PROCESS
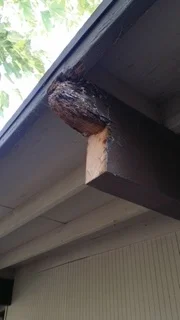
For each exposed beam we start by inspecting the affected areas of decay to determine how much we need to cut out or remove entirely. Moreover, we are determined to leave as much “good wood” as possible to maintain the beams structural integrity.
Each projecting beam of your home will be carefully measured.
The end cap measurements are submitted to a local manufacturer.
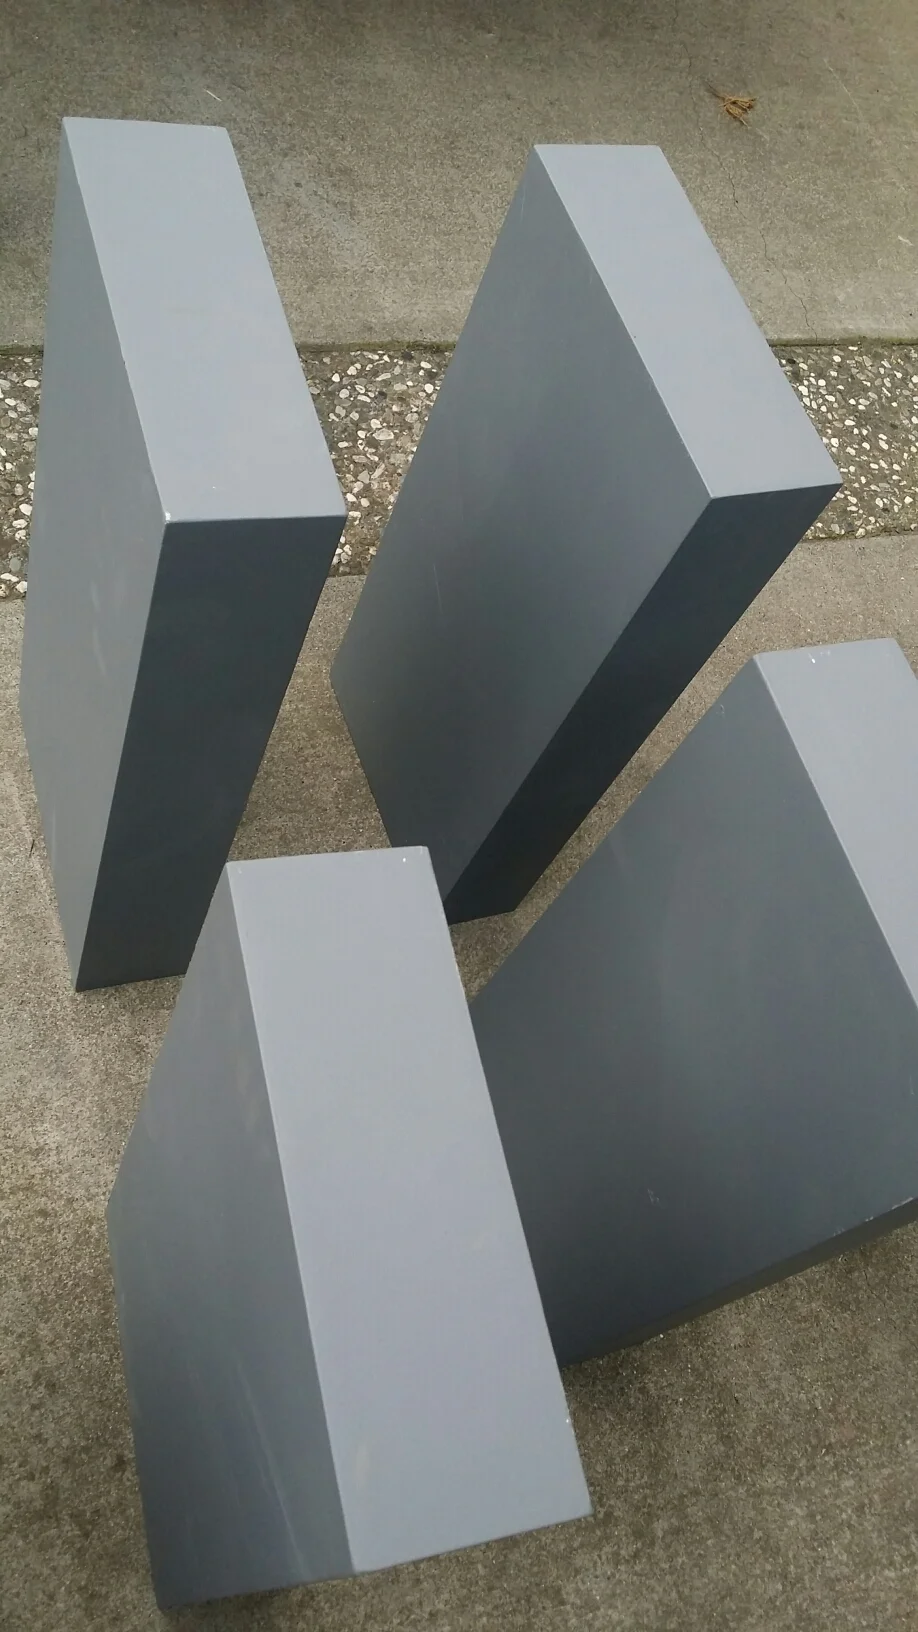
Each RETRObeam is welded together with fourteen gauge steel to provide water proof protection.
Before installation, each RETRObeam is cleansed, primed, then painted to match your existing trim color.
Our technician carefully removes the fasteners connecting the fascia to the existing beam, then simply slips on the RETRObeam.
The RETRObeams are attached with minimal amount of fasteners while maintaining the original structural integrity.

Old, decayed beam
Preparing the original beams
RETRObeams ready for installation

Installing the beams
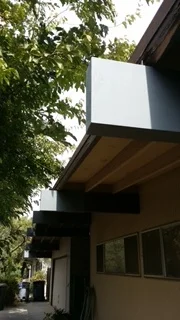
Installed RETRObeams

Final results